The holiday season ushers in a delightful array of culinary traditions, from savory roasts to decadent desserts. Amidst the grandeur, there's a beloved dish that often gets overlooked but consistently steals the show with its vibrant color and refreshing taste: the cranberry pineapple gelatin mold. Far more than just a simple jiggle, this classic concoction offers a perfect balance of tart and sweet, a beautiful presentation, and a welcome lightness amidst heavier holiday fare. It's a nostalgic nod to simpler times, yet remains a surprisingly elegant addition to any festive table.
Whether you remember it from your grandmother's Thanksgiving spread or are discovering its charm for the first time, this easy cranberry pineapple gelatin mold is a must-make. It's not just a dish; it's a conversation starter, a burst of festive color, and a truly delicious experience that will have everyone asking for the recipe.
The Enduring Charm of the Cranberry Pineapple Gelatin Mold
Gelatin molds, often fondly referred to as Jell-O salads, hold a unique place in culinary history, particularly within American holiday traditions. They emerged as a popular staple in the mid-20th century, celebrated for their visually appealing forms, ease of preparation, and refreshing qualities. The cranberry pineapple gelatin mold, in particular, became an instant classic due to its harmonious blend of flavors and vibrant hue, perfectly complementing the festive palette of fall and winter celebrations.
What makes this specific combination so enduring? Cranberries bring a characteristic tartness that cuts through the richness of holiday meals, while pineapple offers tropical sweetness and a pleasant textural contrast. When suspended in a raspberry-flavored gelatin, the result is a symphony of tastes that is both bright and comforting. This dish often serves a dual purpose on the holiday table: a light, palate-cleansing side dish that can effortlessly transition into a delightful, not-too-heavy dessert.
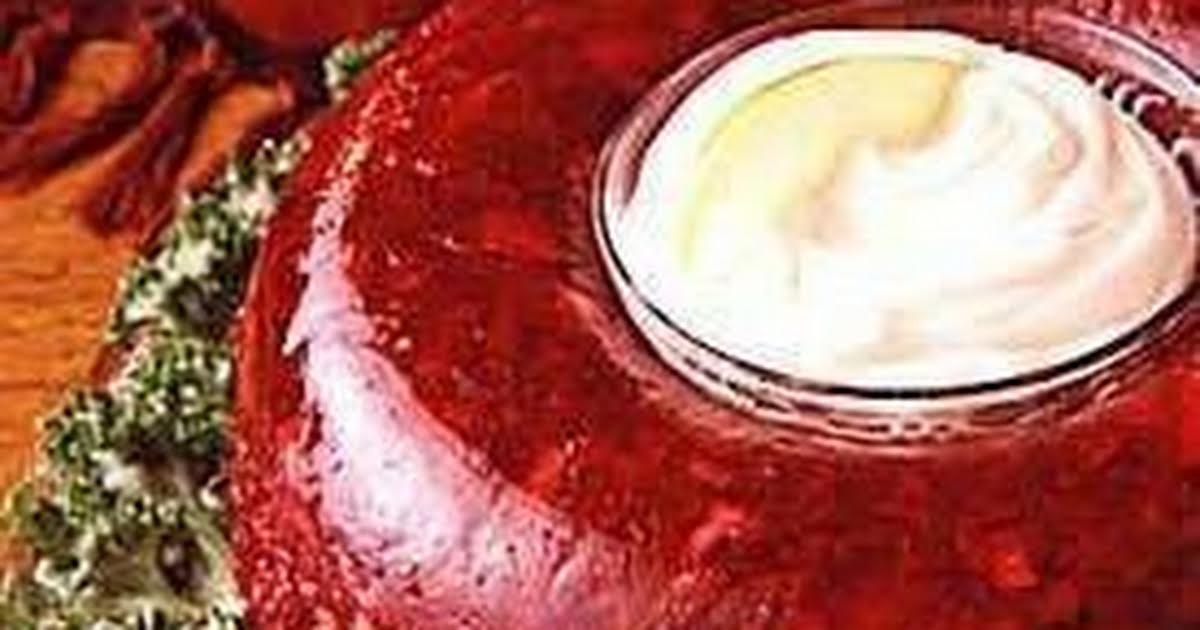
The visual appeal is undeniable. A beautifully unmolded gelatin creation instantly elevates your presentation, showcasing the suspended fruit and nuts in a shimmering, jewel-toned display. It evokes a sense of nostalgia, reminding many of cherished family gatherings, while simultaneously feeling fresh and exciting for new generations experiencing it for the first time. It’s a testament to simple ingredients coming together to create something truly special and memorable.
Crafting Your Perfect Cranberry Pineapple Gelatin Mold: A Step-by-Step Guide
Creating this festive centerpiece is surprisingly straightforward, requiring minimal fuss for maximum impact. Here’s a detailed look at the process, ensuring your cranberry pineapple gelatin mold turns out perfect every time.
Essential Ingredients:
- 2 (3-ounce) packages raspberry gelatin powder: Provides the foundational flavor and color.
- 0.5 (8-ounce) envelope unflavored gelatin: Crucial for extra firmness, especially when incorporating heavy fruit and for a cleaner unmolding.
- 1 cup boiling water: To thoroughly dissolve the gelatin.
- 1⁄2 cup cold water: To help set the gelatin and bring down the temperature.
- 1 (8-ounce) can crushed pineapple with juice: Adds sweetness, tang, and texture. The juice contributes to the overall flavor and moisture.
- 1 (15-ounce) can whole berry cranberry sauce: The star of the show, offering a beautiful color, tartness, and a delightful berry texture.
- 1⁄4 cup finely chopped walnuts: Provides a pleasant crunch and nutty flavor, a classic pairing with cranberries.
Preparation Instructions:
- Prepare Your Mold: Lightly spray a 4-cup gelatin mold (a classic ring mold works beautifully) or a 9-inch square pan with vegetable oil cooking spray. This crucial step prevents sticking and ensures a clean release.
- Dissolve Gelatin: In a medium glass mixing bowl, combine both the raspberry gelatin powder and the unflavored gelatin powder. Pour in 1 cup of boiling water. Using a metal spoon, stir continuously for a full 2 minutes. It's essential to ensure all gelatin granules are completely dissolved for a smooth, lump-free final product.
- Cool and Combine: Stir in the 1/2 cup of cold water. Then, add the crushed pineapple (with its juice), the whole berry cranberry sauce, and the finely chopped walnuts. Stir gently but thoroughly with your metal spoon until all ingredients are completely incorporated and evenly distributed throughout the gelatin mixture.
- Chill to Perfection: Pour the mixture carefully into your prepared mold. Cover the mold securely with plastic wrap to prevent any refrigerator odors from affecting the flavor and to keep the surface from drying out. Refrigerate until completely firm. This will take at least 6 hours, but for best results and easiest unmolding, chilling overnight is highly recommended.
For more in-depth techniques and troubleshooting for the main dish itself, don't miss our guide on Mastering the Cranberry Pineapple Gelatin Mold with Topping.
Elevating Your Gelatin Mold: The Irresistible Cream Cheese Topping
While the cranberry pineapple gelatin mold is spectacular on its own, a creamy, tangy topping takes it from great to truly unforgettable. This simple addition provides a delightful textural and flavor contrast, making each bite even more satisfying.
Topping Ingredients:
- 1 (8-ounce) package cream cheese: Softened to room temperature for easy blending.
- 1⁄4 cup confectioners' sugar: Adds a subtle sweetness.
- 2 tablespoons whipped cream: Contributes to a lighter, airier texture and richness.
- 1⁄4 cup walnuts, chopped: For extra crunch and to echo the nuts in the gelatin.
Creating the Topping:
In a small bowl, combine the softened cream cheese, confectioners' sugar, and whipped cream. Mix with a spoon or a hand mixer until thoroughly combined and smooth. Fold in the chopped walnuts. About an hour before you plan to serve, spoon this luscious topping into the center of your unmolded gelatin mold. The creamy texture and slightly tangy flavor perfectly complement the sweet-tart gelatin, creating a truly balanced and decadent experience.
Flavor Profile: The rich, smooth, and slightly tangy cream cheese topping acts as a beautiful counterpoint to the bright, fruity, and firm gelatin. The added walnuts in the topping provide an extra layer of crunch, mirroring the texture within the mold itself, making for a cohesive and delightful bite every time.
Insider Tips for Gelatin Mold Success (and Effortless Unmolding!)
Achieving a perfectly set and beautifully unmolded cranberry pineapple gelatin mold doesn't require culinary wizardry, just a few insider tips and a dash of patience. These insights will ensure your holiday centerpiece looks as fantastic as it tastes.
Choosing Your Mold Wisely:
While a classic 4-cup ring mold is traditional and undeniably elegant, don't feel limited. A 9-inch square pan is a great alternative if you prefer to cut the gelatin into squares or diamonds for serving. For individual portions, consider using smaller ramekins or decorative dessert cups. The key is to choose a non-porous mold material (glass, metal, or silicone) that allows for easy release.
The Power of Cooking Spray:
Do not skip spraying your mold with vegetable oil cooking spray. This creates a thin, slippery barrier that is essential for a clean release. Even if your mold is non-stick, a light coating acts as an extra insurance policy against sticking.
Patience in Chilling:
This is perhaps the most critical step for success. While a minimum of 6 hours is often cited, aiming for an overnight chill (10-12 hours) is ideal. The longer the gelatin has to firm up, the sturdier it will be, making unmolding much easier and preventing any risk of your mold collapsing. A truly firm gelatin mold will also hold its shape better on the serving platter.
The Art of Unmolding:
Unmolding can be the most nerve-wracking part, but it doesn't have to be! Here are two reliable methods:
- The Warm Water Bath Method: About an hour before serving, fill a larger bowl or sink with warm (not hot!) water. Dip the bottom of your gelatin mold into the warm water for about 15-30 seconds. The warmth slightly melts the outer layer of gelatin, creating a release from the mold. Be careful not to let the water seep into the mold.
- The Room Temperature Release: As suggested by culinary icons like Paula Deen, sometimes simply allowing the mold to sit at room temperature for about an hour before serving is enough. The slight change in temperature can help the gelatin contract just enough to release its grip.
After either method, place your chosen serving platter on top of the mold, then confidently invert the mold and platter together. Give a gentle shake if needed. The gelatin should slide out cleanly. If it resists, you can try re-dipping it in warm water for a few more seconds.
Creative Variations and Garnishes:
While the classic recipe is perfect as is, feel free to experiment:
- Orange Zest: For an extra layer of bright, citrusy flavor, add 1-2 teaspoons of fresh orange zest to the gelatin mixture along with the pineapple and cranberry sauce. This subtly enhances the fruitiness.
- Fresh Cranberries: For garnish, sprinkle a few fresh whole cranberries around the base of the mold on the serving platter.
- Mint Sprigs: A few fresh mint sprigs tucked around the base add a lovely pop of green color and a refreshing aroma.
- Different Nuts: Pecans can be substituted for walnuts, or you can use a mix of both.
Make-Ahead Marvel:
The beauty of the cranberry pineapple gelatin mold is that it's a fantastic make-ahead dish. Prepare it a day or two in advance, keep it covered in the refrigerator, and it will be perfectly set and ready for your holiday gathering, freeing up valuable time on the day of your event. For more insights into how to integrate this dish seamlessly into your holiday meal planning, you might find inspiration from Paula Deen's Classic Cranberry Pineapple Gelatin Salad Recipe, which has popularized this festive dish for generations.
Storage: Keep any leftovers covered in the refrigerator. It will remain delicious for 3-4 days.
The easy cranberry pineapple gelatin mold is more than just a recipe; it's a delightful tradition waiting to be embraced. Its simple preparation, stunning appearance, and refreshing taste make it an indispensable part of any holiday spread. Whether served as a vibrant side dish or a light, festive dessert, this classic is guaranteed to bring smiles and compliments. So, this holiday season, gather your ingredients, dust off that mold, and create a masterpiece that will become a cherished part of your family's festive memories for years to come.
